Showing posts with label Cooking. Show all posts

Monday, 25 June 2018

What Else to Do in BKK - Apart from Eating and Shopping and oh Massage!

2018 - how fast you have come; and how fast half a year has gone by.

It has been a challenging half year, with 2 kids now in primary school, new activities and more work. Sometimes, the only thing I want to do after work and dinner is hide at a corner and play Pokemon Go or Candy Crush.  Tell me - you feel me.  :)

Despite the hectic schedule (bluff who?!  You ask.), I manage to squeeze some time to travel.  Bangkok has always been a yearly go-to country before I had kids.  Now that the children are older, I seem to be getting back there yearly.  Well, at least for 2017 and 2018.  I probably have not blogged about such trips because, it's just eat, shop, eat, shop.  Oh, and foot massage every night.  At S$8 for an hour, where to find?!


We did nothing of those touristy stuff, nothing about the Floating Market or Grand Palace because i've been there when i was much younger.  In the trip last year with my mum and sis, we did something different.  We went for a cooking lesson.  Of course, to learn Thai cuisine!

We pre-booked our classes and chose the dishes that we were interested in.  On the day itself, turn up at the meeting point and the people from Bangkok Thai Cooking Academy will be there to bring you for a market tour before the cooking class starts.


Colours of the market
The ingredients for the choice of your dishes are prepared and one has to cut and chop his / her own ingredients.  We had fun using a big mortar and pestle and I always hear from the older generation that there is really a difference using that to grind ingredients into a fine paste as compared to using a blender or food processor.  What do you think?


Got to cook my own food too!  The good thing is not having to wash the pots and pans.  :)  


And ta-dah!  My lunch!  We did the morning session and thus, this was our lunch after all the cooking.  If you cannot finish all the food (which is actually a lot for a person), you can packet them back too.  We didn't though because we were off to other places.  


There were about 12 pax in the class but each had their own set of ingredients and cooking station.  After the session, recipes were given out too.  And so, off we went to the supermarket to buy some of those Thai ingredients.  Haha!  How aunty we are, right?

It was an interesting experience.  And a way to understand more of the ingredients that go into the Thai food I always love.  I saw couples in the class too, so it may be a good activity for couples.  :)


Disclosure:  This post may contain affiliate links, which are at no additional cost to you.  I will receive a commission if you click the link and purchase something.  :)

I'm on Facebook!  Please like me on Facebook if you have enjoyed this post as it's where I connect constantly with my readers.  I'm on Instagram and Twitter too!

Thursday, 7 September 2017

For the Love of Ngor Hiang


As I grow older, I tend to reminisce about my younger days, days when my late grandma was still around and cooked much.

My paternal grandma was a good cook, cooking most of our meals while Mum works.  During festivities, she, my mum and aunts will cook up a storm.  Curry chicken, pork stomach soup, ketchup prawns, fried beehoon, ngor hiang, Hokkien popiah and so much more...  Sometimes I wonder if such "traditional" food aren't learnt by our generation, will we or our children ever get to eat them next time...

Just that day, I was missing Ngor Hiang.  I have never made them.  Ate a lot of them though.  So I ringed Mum for help!  


These cannot be compared to those bought outside.  Because homemade are always the best.  Initially thinking it is going to be difficult, but it was not!  In fact, I made a batch and kept some to be air fried another day.


I do not know if you ever have such a problem, but recipes passed down to me are 80% about estimation.  My Mum will say, "agak-agak" a.k.a estimate.  :D


Ngor Hiang

Ingredients:
8 prawns, de-shelled and chopped
500-600g minced pork
6 water chestnuts, peeled and chopped (I liked mine with the crunchy bite so I do not chop them too finely)
1.5 tsp five spice powder
1/4 tsp white pepper powder
1.5 tbsp corn flour
1 piece of dried bean curd sheet, cut into rectangles of desired size
1 egg

Method:


1. Combine everything except dried bean curd sheet and mix.  Leave aside.
2. Wipe the dried bean curd sheets with a damp cloth to remove some of its saltiness.  Do not use a wet cloth or the bean curd sheet may tear.
3. Fill the middle of each bean curd sheet with about 2 tbsp mixture.  For a Ngor Hiang the size as shown.
4. Fold the sides in.  Lift the side nearest to you and roll tightly inwards into a roll.


5.  Steam the rolls for about 15 minutes, or till the meat is cooked.

I love to eat steam Ngor Hiang actually.  Much more than fried ones.  It isn't that difficult to make them, just more work than stir frying and steaming.  


I'm on Facebook!  Please like me on Facebook if you have enjoyed this post as it's where I connect constantly with my readers.  I'm on Instagram and Twitter too!


Wednesday, 24 May 2017

Song-Cho Rice Cookers - Why It is One of a Kind!

April and May have been eventful, both on home front, but also on the work front for me.  Yes, if you do not know, I am a full time working mother.  And I get people asking how I juggle, without any external help, i.e. helper or maid.  Well, my children are in full time day care and I have a pretty hands-on hubby, so I am really not that super.  I place priorities on different things - my house is always messy, my laundry basket is always full and so on, thus, I am not that overwhelmed on a daily basis.

But one thing for sure.  I try to cook as much as I can, although I know how we mothers feel after a long and tiring work day.  Which is why I rely a lot on kitchen gadgets.  And one such gadget is the rice cooker.

One may say that a rice cooker is just a rice cooker, why and how can any be so special?  I agree that the rice cookers in the market now are features-packed.  Apart from cooking rice, they can be used to steam and bake too.


But the rice cooker I am using now is different because of a very important component.  Its stainless steel inner pot!


Those who personally know me knows I am very particular over certain things, especially when it comes to feeding the children and things for the children.  Through reading and researching, it seems that we should just go back to basics, and that is using stainless steel for cooking.  I have had non-stick, teflon coated inner pots and pans and I get upset each time I see the peeled coatings.

I shall be very bias here as to why Song-Cho rice cookers then?  It is because they are the only rice cookers makers with stainless steel inner pots.  Totally what I am looking for.  Apart from the fact that it is made from food grade stainless steel, there is also no chemical coatings, thus making it perfect for use in cooking.  Plus, many I know often change their inner pots.  This, I think will last quite a long time.

For an idea of why I so much prefer a Song-Cho rice cooker with it's premium inner pot, this visual description explains everything.


Credit : Song-Cho (Imp & Exp) Pte Ltd 


One of the newer range of rice cookers, the SC-FCM58 model has 12 different modes of cooking.  But seriously, cooking rice and porridge are my favourite because a rice cooker is a rice cooker!  For the different ranges of rice cookers Song-Cho carries, click here!

My boys love the porridge cooked using the rice cooker.  Me too!  No longer do I need to stand by the stove, stirring the grains, hoping it will not get burnt.  Using the Porridge function, I get "sticky" porridge which my boys love in just an hour.  Tell me about achieving more in an hour.  The porridge is good for toddlers too!


Due to it's superiority in heat conductivity, one-pot rice cooker claypot chicken rice is easy.

By using the Reheat mode, I stir fried the ginger in the rice cooker itself with a little sesame oil, and added in bacon as I did not have Chinese sausage.  Thereafter, I put in the mushrooms.  It is quite uncommon to see ginger and bacon in our traditional claypot rice but we realise that with ginger, it makes the rice more fragrant.  Bacon was an adventure test that I did and interestingly, it adds a tinge of "saltiness" a.k.a the giam giam (Hokkien) at every bite.


Closed the lid to let it heat up and mixed in the chicken slices and rice after that.


Once mixed and water added, I closed the lid and started the cooking process by pressing the Start button after choosing the Crust mode. 


The see through glass cover will be useful especially when the bake or soup mode is used.  Don't you love it when you can see the food you are cooking when it is almost done?  I thought it was really cool as I love peering at my food.


So, here's my kind of one-pot rice cooker claypot rice.  I used to fry the items at the stove before putting them into the rice cooker but with this rice cooker, it's everything one-pot.  Totally for strapped-for-time-yet-want-variety parents like me.


One-Pot Rice Cooker Claypot Rice

Ingredients:

1 chicken breast - cut into small chunks
3 dried Chinese mushrooms - soaked and sliced
1 Chinese sausage, or a slice of bacon  - sliced
Garlic and ginger - chopped and sliced thinly respectively
2 cups of rice

Marinate
1 tbsp sesame oil
2 tbsp dark soya sauce
2 tbsp oyster sauce

Method:

1. Marinate the chicken with the items under "marinate".
2. Using Reheat mode, stir fry ginger and garlic with a little of sesame oil in dry inner pot.
3. Add in Chinese sausage or bacon and stir fry till fragrant.
4. Add in Chinese mushrooms.  Close the lid to heat it up slightly.
5. Add in chicken slices and stir fry till chicken is partially cooked before adding in the rice.  Mix it well.
6.  Using the measuring cup, add in 2 cups of water.   (This is for white rice.  For other rice, add in the appropriate amount of water for the different rice types.)
7. Cancel the Reheat mode and press start for the Cook mode.
8. When the rice cooker beeps, the claypot rice is ready!  Drizzle more dark soya sauce if preferred and enjoy!


Disclosure: We were given the Song-Cho Rice Cooker for product review purposes.  No monetary compensation was received.  All photos and opinions are true to my own unless otherwise stated.

I'm on Facebook!  Please like me on Facebook if you have enjoyed this post as it's where I connect constantly with my readers.  I'm on Instagram and Twitter too!

Saturday, 8 April 2017

Quinoa [藜麦] - The Super Food from Superlife Co.

You probably have read that the hubs and I are currently trying on some kind of "diet" - our own kind of diet.  Low carbs, no (added) sugar diet.  As such, we have been pretty much playing around with our grains, to substitute our very Asian palate of white rice.

Interestingly, we got attracted to this superfood called Quinoa [pronounced "keen-wah"].  Commonly known as a grain, it is actually a seed.  One that is packed full of benefits, thus the high rating for being a healthy food.

So what is quinoa?

It is a protein-packed seed that is low in sugar.  Also high in fibre, it is an excellent rice replacement. 

Some people dislike quinoa because they find the taste "nutty".  Some find it tasteless.  And I agree that plain quinoa can be quite unappetising especially if you are so used to white rice.  However, Superlife Co. changed the whole "food" game.


With the introduction of the Asian Quinoa Packs, Superlife Co. manage to incorporate many of the Asian flavours with quinoa.  From Korean kimchi to Thai green curry, from non-spicy mushroom to spicy curry, I am sure there is one that suits every taste buds.

As I found something the family love!  And it is non other than the Japanese quinoa.  The nori seaweed was a refreshing change to the plain quinoa we often cook.


Each individual pack is 90g and serves 1 to 2 persons.  Easily a complete meal when paired with some vegetables and meat.


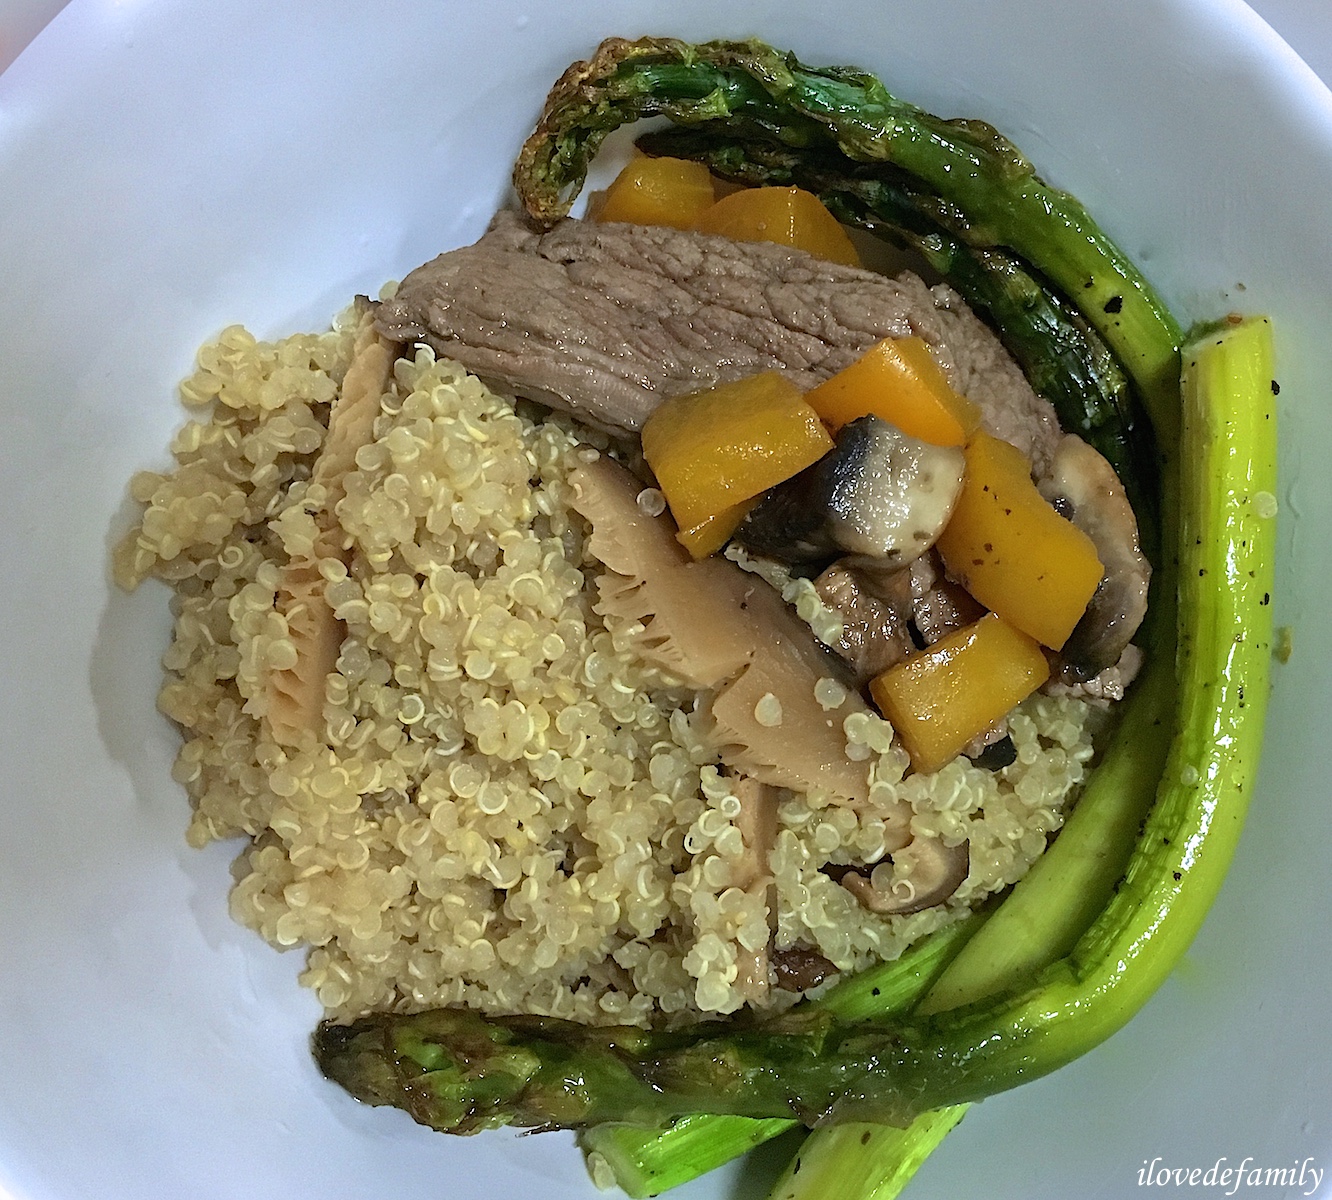
Here's my version of stir-fry beef with capsicums, roasted asparagus and mushroom quinoa.  My kind of one-bowl meals.  Zero pretence, zero added sugar.  Just pure good food.  :) 


Superlife Co. only imports the most premium quinoa that is pesticide-free, non-GMO and organically-grown using ethical and sustainable agricultural practices.  Totally what I look for in superfoods.

Then there is this Protein Bloc.  Made from 70% Tanzania organic premium taco, 10% quinoa and 20% sugar, it is an interesting block.  As much as I would prefer a block with no sugar, it is not easy to find one that is completely sugar free.  The fact that Superlife Co. states the percentage of the sugar in the block makes me feel more in control as I know how much sugar it contains.

The hubs tasted it too and found it pretty tasty.  I guess we would rather eat this, than many of the other yogurt bars and chocolate bars out there.  And it's so so so so much convenient!


Thinking to try out the different flavours?  Get the Quinoa Starter Pack!  It has one of every flavour of the Asian Quinoa packs, together with 3 of the quinoa cacao protein blocs.  Perfect.

And to make these superfoods "sweeter", enter SUPERCYN17 at checkout to get a 10% off your online purchases.  Valid for a minimum purchase of $40, this code last till 30 June 2017 (excludes the Cacao subscription).

Try it and let me know how it is!  I am bringing my kimchi quinoa with more kimchi to work next week!

Disclosure: We were given the quinoa starter pack for product review purposes.  No monetary compensation was received.  All photos and opinions are true to my own unless otherwise stated.

I'm on Facebook!  Please like me on Facebook if you have enjoyed this post as it's where I connect constantly with my readers.  I'm on Instagram and Twitter too!

Sunday, 19 March 2017

Spicy Bean Sprouts Salad Recipe

We love this particular bean sprouts salad or appetiser from a particular Ramen restaurant / shop in Singapore.  We help ourselves to heaps of it when we dine there.  It is free.  But we do not eat that till we are full.  Our main course is still the ramen, right?

Fast forward, B has been asking me to find the recipe for it.  He says we can made lots of it and keep them refrigerated.  A good snack whenever we feel like eating it.  But seriously, I doubt we can keep it for too long since there is no preservatives!

I scoured the internet for it, not knowing what to call it except to Google bean sprouts, ramen, recipe.  And lo and behold, I actually found one!

I did some variation to the recipe that I found.  This is slightly spicier but E loves it.  He eats and drinks water after each mouth.  And he has been bugging me to make it every other day.

The good thing is, bean sprouts are cheap.  I hate to pluck the bean sprouts roots though, so I pay slightly more for those that are rootless.

Spicy Bean Sprouts Salad
(Adapted from Just One Cookbook)


Ingredients:

300g bean sprouts
2 tbsp sesame oil
1 tsp soy sauce
1 tsp Nanami Togarashi (easily found in the Japanese section of supermarkets)
Salt and pepper to taste
Sesame seeds

Method:

1.  Cook the bean sprouts in boiling water for about 2 minutes. 
2.  Mix the seasonings (sesame oil, soy sauce, Shichimi Togarashi, salt and pepper) in a large bowl.
3.  Drain the bean sprouts and mix them with the seasonings.
4.  Sprinkle sesame seeds.


We love the smell and taste of sesame seeds and thus, we put lots of it usually.  There you go!  It is actually quite a forgiving recipe, so if you like it spicier or less saltish, always tune it to your liking.  :)

I'm on Facebook!  Please like me on Facebook if you have enjoyed this post as it's where I connect constantly with my readers.  I'm on Instagram and Twitter too!

Thursday, 4 August 2016

One-Bowl, No-Mixer Banana Muffins

It has been awhile since I last baked, well apart from baked pasta and roasted chicken and the likes.

A bunch of bananas lying in the kitchen prompted a frantic search for something easy to deal with it.  I was determined not to let it turn black and feed the dustbin.

The boys have been asking for their cupcakes, muffins for a while but I have still been pretty much suffering from the hangover from the school holidays and my vacation (oh I know, it's been so long right?).
 
 
Determined, I did a one-bowl, no-mixer banana muffins.  Done in 30 minutes, of course excluding the baking times.  And it was so easy that the boys chipped in to help.

 
They mashed the bananas (some motor skills there, yea), whisked the wet ingredients.  Very nicely, they helped wipe dry the muffin pan and lined it with their favourite cupcake liners, before scooping the mixture into them. 

I love baking with them, if the mess is not too much to handle.  Especially with sugar (headache).  Now that D is in primary school and reading much more, he reads the recipe to me sometimes.  Of course, I get squabbles too as they argue who should be doing what.  Haha 


This photo of the banana muffin is not the best because it was taken in the morning when we ate them.  At 6am, orange lights, that's probably the best I can do with an iPhone.  :D
 
But boy was it nice!  It tastes somewhat like the fried banana balls that I always like buying from Malay stores or Subway Niche.  Oh it's call Kueh Kodok. But this isn't fried and it is definitely healthier with coconut oil.  
 
Out of the 10 I made, the 2 young boys had 6 of them.  :)

One-Bowl No-Mixer Banana Muffins
Makes 8 to 10 muffins
Adapted from Foodie Baker
 
Ingredients
 
3 tbsp buttermilk or 3 tbsp milk with 1 tsp lemon juice
3 tbsp coconut oil
3 tbsp raw sugar (I used raw sugar because I did not have brown sugar)
1 egg
½ tsp vanilla extract
225g over-ripe bananas, mashed
120g plain flour
½ tsp baking soda
Pinch of salt
 
Method
 
1.  Preheat oven to 175 degree Celsius.  Line muffin / cupcake mould with liners.
 
2.  In a large mixing bowl, whisk whisk buttermilk (milk with lemon juice), coconut oil, sugar, egg and vanilla extract together until well-mixed.  Whisk in the mashed bananas.
 
3.  Sift the flour, baking soda and salt into the wet ingredients.  Fold with a spatula until well-mixed.  Fill the liners with the batter until ¾ full.  
 
4.  Bake for 17 to 20 minutes until a skewer inserted into the centre of the muffin comes out clean and the top of muffin springs back when lightly touched.
 
5.  Remove the muffin tin and set on a wire rack to cool completely.
 
We baked it in the evening and had them stored air-tight overnight.  Let me know if you bake it and if it taste just as good warm after it's baked.  :)
 
I'm on Facebook!  Please like me on Facebook if you have enjoyed this post as it's where I connect constantly with my readers.  I'm on Instagram and Twitter too! 

Wednesday, 20 July 2016

Masterclass with Anna Olson and an Inspired Recipe!

I love watching cooking shows.  I love watching celebrity chefs.  :)

And to my delight, I met Chef Anna Olson in person!  Double :)


Anna Olson is a professionally trained pastry chef with over fifteen years of experience in the culinary field.  She shares her talents with the world through award winning cookbooks, television shows and other culinary businesses.

Some of my friends always think I cook well.  Some cannot imagine how I am able to cook after work.  I guess, it is just the passion of cooking for people I love and feeling so so so happy when they enjoy the food I cooked.  But, there are also days when I do not know what to cook, days when the food seems so boring and mediocre.  There are days I need inspirations.

When I first saw the menu, I knew I had to attend this hands-on Masterclass with Anna.  This is the prelude to what will be premiering exclusively on Asian Food Channel starting Friday, 29 July 2016 at 9.00pm.  "Inspired with Anna Olson" - Anna's brand new show, will bring us on a journey from street food stalls to high-end restaurants, learning about Asia's best-loved signature dishes.  It will also show her adapting the techniques, ingredients and flavours gathered from her travels to create new inspiring dishes that will leave us drooling for more.


Sarah Benjamin, the host for the day, is also one of the two winners of the first season of Food Hero and hosts her own Asian Food Channel web series called Simply Special.

Warm and personable, Anna's shares her tips to some cooking techniques.  And although she is a trained pastry chef, she does not stop at just doing bakings.  How inspiring it is when I saw that she uses our Chinese kind of steamers to cook one of the dishes - Singapore-Filipino-inspired Steamed Carrot Cake with Sweet Potato Ice Cream.


This Singapore-Filipino-inspired Steamed Carrot Cake is just one of the items taught in the Masterclass.  An East-meets-West combination, this carrot cake is Anna's take of Singapore's daikon radish side dish steamed to become a dessert, with a little savoury spice.


When the Chinese steamer meets a ramekin.

Eat it plain on its own, like what we Asians usually do for a carrot cake, or pair it with ice-cream, and see it being transformed to a different kind of dish.


Loving the Masterclass as I learn, have fun and meet fellow bloggers (partnering with Vera from Life is in the Small Things).
Photo credit : Asian Food Channel
If you love beef pho, then you will love this too.  I absolutely adore it.  For those who do not like it raw, you can always sear it first.

And, it is just that dish to make when one is feeling not so good, because, you get to flatten that beef with the meat mallet.  Go on, vent your frustrations.  Just kidding!  Note that no one was hurt while we were at it (as shown in the above picture).


This beautiful Vietnamese-inspired Beef Carpaccio with Pho Flavours is a starter dish that Anna took inspiration from the Beef Pho.  Using homemade Hoisin Sauce (yes, no longer do I need to buy bottled ones!!), this easy to prepare dish is packed full of flavours.  Please see recipe at end of post!  

Cooking at a Masterclass in CulinaryOn means all ingredients are prepared and there is no need to wash the plates and bowls.  Lovely.  Haha.


Risotto has always been something that I cannot perfectly master and with tips in my head, I shall continue trying to cook that one nice risotto dish for the family.

Do you know Anna's Malaysian-inspired Shrimp and Coconut Risotto with Pickled Jalapeno is taken from which Malaysian dish?  

It is from the Nasi Lemak!  Did you get it right?  How creative, isn't it?  It indeed motivated me as I try to create some new dishes for the family so that they will be spared of that usual fare cooked by me.

This risotto has a rich and intense flavour, bringing out the aromatic coconut milk used and the sweetness of the big prawns.

Lovely three course menu that I learnt to prepare.  All very different and each full of flavours.


Like I mention earlier, here is the recipe for the Beef Carpaccio with Pho Flavours, courtesy of Anna Olson and Asian Food Channel.


Vietnamese-inspired Beef Carpaccio with Pho Flavours
Recipe courtesy of Anna Olson

Yield: 8 appetizer servings

Prep Time: 20 minutes
Cook Time: 5 minutes

INGREDIENTS:

350g beef tenderloin
30g thinly sliced red onion rings (about 3 slices)
125g bean sprouts
20g total chopped fresh coriander, Thai basil & mint
35g chopped roasted peanuts
Sriracha, to taste
1 lime, cut into wedges, for garnish

For Hoisin:

60ml soy sauce (low sodium)
30g smooth peanut butter
30ml honey
1 clove garlic, minced
5ml sesame oil
1 cinnamon stick
1 star anise
3 whole cloves
3 black peppercorns

METHOD:

1. For the hoisin, place all of the ingredients in a small saucepan and bring to a simmer over medium heat, whisking occasionally. Simmer for about 5 minutes, then strain out the spices and cool to room temperature before chilling until ready to serve.  The sauce will not be as thick as commercial hoisin.

2. For the beef, slice the raw tenderloin across the grain into 1/2 cm (1/4 inch) slices.  Place a slice into a re-sealable bag and using the flat side of a meat mallet, pound it as thin as possible without tearing the meat.  Repeat with the remaining slices and arrange them on a large platter or individual small plates.  Cover the platter or plates with plastic and chill until ready to serve.  This should be done the same day you wish to serve the dish.

3. Have all of the remaining ingredients on hand, to assemble right before serving.  Sprinkle the onion slices overtop the beef and sprinkle the bean sprouts over in an even layer.  Top this with the chopped fresh herbs and the chopped peanuts.  Drizzle the hoisin over this and add sriracha to taste.  Arrange the lime wedges of the platter or plate and serve immediately.

If you love Chef Anna Olson or would like to be inspired to try new recipes and / or new creations like I do, remember to tune-in to Inspired with Anna Olson, premiering Friday, 29 July at 9pm on Asian Food Channel (Starhub Ch 435).

Disclosure:  I was invited to the Masterclass with Anna Olson.  No monetary compensation was received.  All photographs, unless otherwise stated, and opinions are true to my own.

I'm on Facebook!  Please like me on Facebook if you have enjoyed this post as it's where I connect constantly with my readers.  I'm on Instagram and Twitter too!